

উইন্ডোজ ব্যবহার রাস্পবেরী Pi উইন্ডোজ IOT ইনস্টল 8.1 / 7 (/ Applydrive বিকল্প এই প্রেক্ষাপটে স্বীকৃত নয়.)
আপনি রাস্পবেরী Pi উইন্ডোজ IOT সেট আপ করা হয় তাহলে, আপনি শুধুমাত্র একটি উইন্ডোজ ব্যবহার মাইক্রোসফট নির্দেশাবলী ব্যবহার করে ইনস্টল করা সক্ষম হবে 10 অপারেটিং সিস্টেম.
আপনি উইন্ডোজ ব্যবহার করে থাকেন 7, 8 বা 8.1 তারপর আপনি পাবেন “/ Applydrive বিকল্প এই প্রেক্ষাপটে স্বীকৃত নয়.” এরর. This is because the dism.exe version on Windows 7, 8 এবং 8.1 উইন্ডোজ dism.exe ভিন্ন 10.
উইন্ডোজ উইন্ডোজ IOT ইনস্টল করার জন্য একটি সহজ উপায় আছে 7, 8 বা 8.1. Just follow the following instructions.
- Download the Raspberry Pi2 Windows IoT latest build from Microsoft Connect

- গ জিপ ফাইল এক্সট্র্যাক্ট:/ইয়ট
- ডাউনলোড imgmount and place the exe file to c:/ইয়ট
- Open a administrator command prompt and go to c:/iot and type imgmount Flash.ffu. This will convert the ffu to a VHD image and mount it in Disk Management
- Go to disk management and detach the VHD
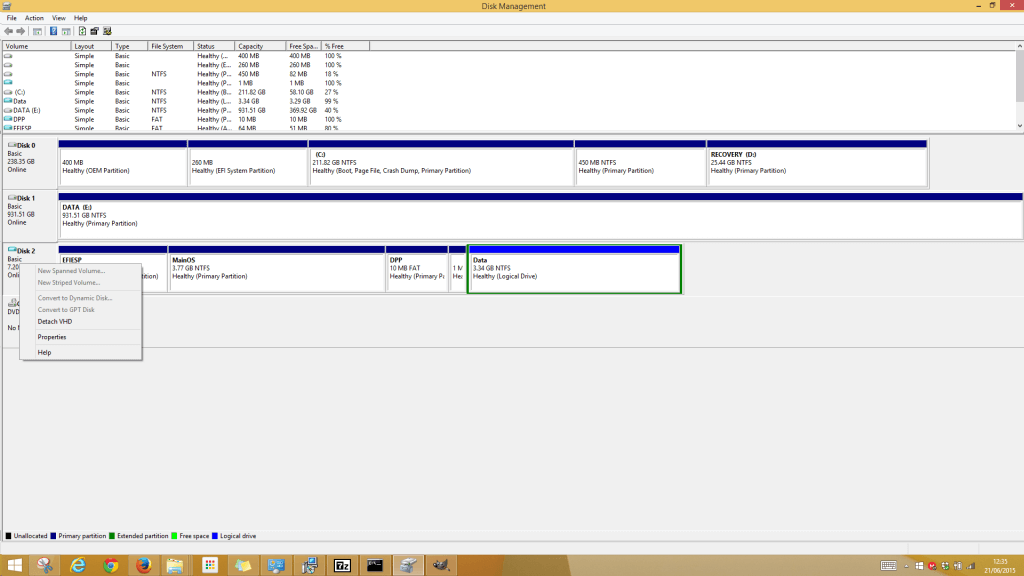
- Next is to restore the VHD file to the SD Card using winimage
- ডাউনলোড winimage and install. Open the winimage administrator
- Click Disk from the menu and choose Restore Virtual Hard Disk image on physical drive
- Select your SD Card from the list and navigate to the VHD file which should be the following path “সি:\Users\{user}\AppData\Local\Temp” .
Restoring the image onto the SD Card can take a while. After it is complete insert the SD Card into the Raspberry Pi 2 and all should be working.
